

It took me a long time to work out the right size of image to get to fit my page. (Like an hour!) Hopefully if you want to do something like how mine is above, this will cut down on the time you have to spend to make it!
First upload your chosen image (the one you will have people click on to go to that tutorial) onto picnik.com (the editing you need is free for all of this, and even some touch ups if you want to do those too.).
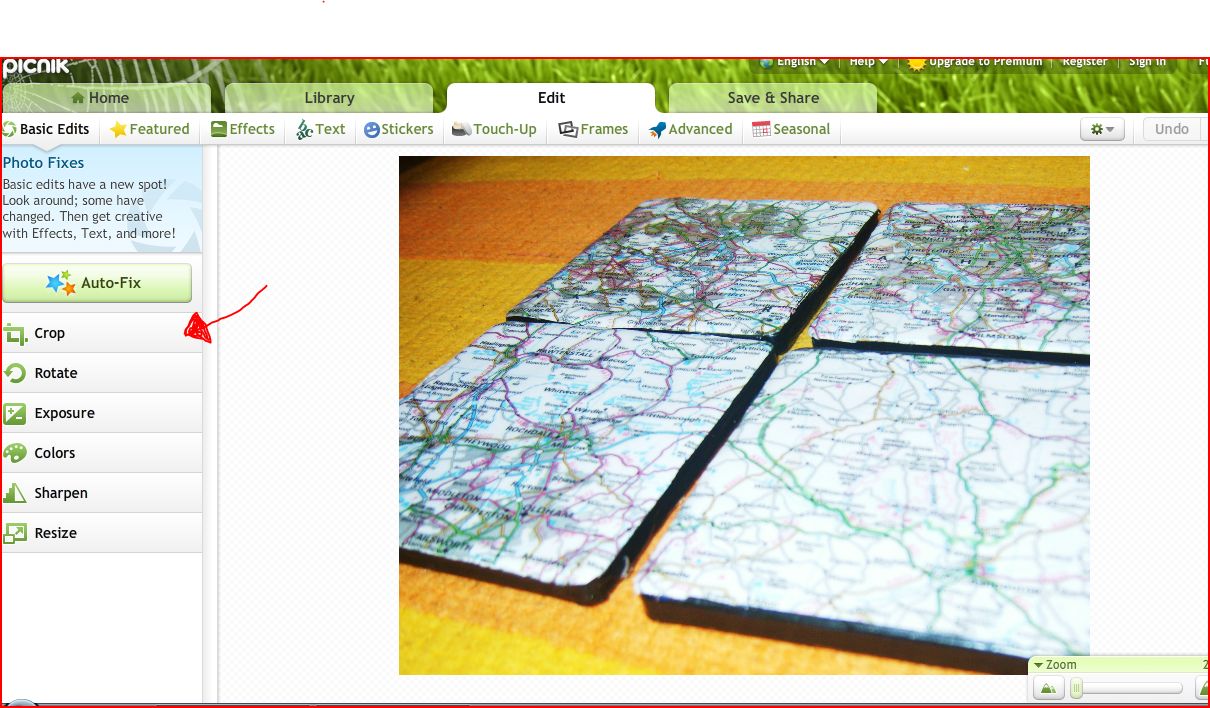
I know, awesome freestyle arrow drawing skills.

Then select square. You can have it so it's not quite a square, but when you change the size later you may end up with a squashed image (I learned this the hard way...).
Crop your image and then select 'apply'.

Then click 'text' to add the name of your tutorial.

Choose the font, adjust the colour and size, move it around and then click 'apply' when you're done.

Next click 'resize' , I know you're blown away by my helpful arrows and circling!

Change the dimensions to 170 x 170 and click apply.
Then save to your computer and insert the image onto your tutorials page. Make it a link using this post.
You may need to adjust your size slightly to work for your blog, but mine is a standard width and it does three on a line easily.
Let me know if you have any questions. Or if you do it yourself. Or if you already knew how to do this and I'm just r e a l l y slow at picking this stuff up!
Enjoy your week!
Featured here:

Thanks for the tutorials tutorial! I need to bookmark this for when I have a few more tutorials up on my blog - I am such a space kadet when it comes to the whole 'prettyfiying' my blog thing and I need all the help I can get!
ReplyDeleteThanks so much for the tute. I am going to start working on this tonight:>
ReplyDeleteYou are so nice to share this info! And it is super helpful because, yes, we will spend hours trying to reinvent the wheel! Very thoughtful of you to post and share!!!!
ReplyDeleteThis is great, I've thought about putting up a DIY page, but haven't gotten around to it yet. I hadn't thought of doing this way though and I love it. Thanks for sharing!
ReplyDeleteThanks for sharing this tutorial!
ReplyDeleteThanks for sharing! Simple and straight forward.
ReplyDeletethanks for the info! stopping by from someday crafts!
ReplyDeleteI'm going to bookmark this for sure...thanks!
ReplyDeleteThanks so much for sharing this! I only have two tutorials on my page as of now and I struggled with that! I'm excited to hear how to do it this way! Visiting from Lil Pink Pocket show and share.
ReplyDeletethanks, I am going to try this out also. thanks for sharing
ReplyDeleteI really like your blog. I am your newest follower!! I am new to blogger, but am excited to share my New boutique that is coming soon with the latest trends on clothing at affordable prices. I also will be selling Mineral Makeup. I will be giving a lot of free giveaways here shortly for our grand opening! I hope you will stop by my blog and follow me back and like my facebook... And Look out for free giveaways on makeup and clothing :)
ReplyDelete-B. Haven
bhavenboutique.blogspot.com
This is great info. I will be sharing it today at:
ReplyDeletewww.mun-emakingblogs.blogspot.com
Thank you!
ReplyDeleteThis is SUCH great info! I love how you explained it so well! Thank you very much! And I'm happy to have you over @ Show & Share!
ReplyDeletethanks for sharing this"!
ReplyDeletePinning this now! It will be a big help when I have some more tutorials to add to my blog! Thanks for sharing!!
ReplyDeleteTracy @ thecraftypolkadot.com