Tuesday, 31 July 2012

Boys jeans refashion

So, this happened to Ethan's jeans. 


I was literally in the process of binning them when I remembered I could sew, and that they still fit him on the waist. 


I used another pair of shorts as a guide for length then cut and pinned and sewed.


Now he has a new pair of shorts.


After these photos I decided to bribe him:


(finally!)

Hooray for sewing to save me some money on shorts. 

Though I guess it's evened out unfortunately, because I was shopping with my sisters and the kids last week and looking at shoes. All the sudden I noticed a horrible smell. And of course my first reaction was "someone with really smelly feet has tried on these shoes!", but then I saw Ethan out of the corner of my eye.

Covered in sick.

(no photo, you're welcome)

SO my sister ran into the next door shop and bought him a new outfit while I tried my best to clean a gallon of kid sick off my poorly boy and his pushchair. 

Glamorous? Absolutely!

Don't worry, once we made our way home (with all the windows open, but man did it still stink!) and he was cleaned up he looked more like this...


Yep, I'm pretty sure he's gonna be an architect.


Sunday, 29 July 2012

No cost wedding hamper (and how to)


My little brother got married last weekend, and in accordance with no spend summer, I tried to come up with wedding gifts using things we already had.

I actually ended up with quite a haul, want to see?


There's a framed quote I love using a frame from my stash, some simple thank you cards, a card made in this style, a love story cushion, (tutorials in the links too), some salt and pepper shakers and a Nigella measuring jug (bought at the beginning of the year for £1 and £5? for this sort of occasion) and a chalkboard.


I actually ran out of time while doing these gifts as I also had a photo wall to do, so my wonderful husband made this for me. It's simply a piece of scrap wood cut down and painted with chalkboard paint.

After it dried I just cut a heart out of foam board, painted it a light blue and hot glued it on.


They're renters, so something that just leans up on the wall or can be simply hung is ideal.


The cards are some small  envelopes I bought a while back and card folded and stamped. There's actually a heart punched out above the words but it was hard to photograph, and in true "me" style I was taking these photos right before wrapping the presents on the morning of the wedding aka stressful times. 


Their wedding card is their new couple name and their wedding date is even hidden on the bottom line (thanks to a buyer from my Etsy shop for putting her head together with me and coming up with that idea!).


I'm thinking that I like this hamper better than any wedding gift I've ever bought before!


Have you done a wedding gift that cost you nothing? What did you make?

P.s. you can check out the other no spend summer projects below:


Thursday, 26 July 2012

Wordy Wednesday

Today's free printable is another quote from my brother's photo wall.


Love this quote! They were all chosen by my brother and sister in law for their wedding. Click the image or here to download.


And here's a little sneak peak of the whole wall...


(My grandma, me, and my sister - post reception!)


Did I mention that it's 13 meters long? And there's another surprise too!

Sunday, 22 July 2012

Love story cushion (tutorial)


My brother got married this weekend! And I wanted to make a few gifts that had a real personal meaning for them, without costing any money...easy right? :)

I already had a cushion form and the fabric, and a crafty friend had brought me over some freezer paper to try out for the first time. 


So I decided to make a cushion showing where their love story began. (York)

Here's the how to:


First off I measured the wrap around width of my cushion and added about five inches, then folded each side over 1/4 an inch, ironed and then repeated.


I then googled "UK" under images and made one of them fill the screen and traced it onto the freezer paper. Then I just spent a few minutes cutting it out and centered it on the fabric.


Iron it on until it's stuck down fully, mine bubbled a little but didn't matter at all.


Using acrylic paint cover the inside of your image. 


Then peel off your paper. At this point I was SO giddy! I couldn't believe how well it worked!


Pretty sweet! :) 


Leave it to dry over night and then embroider a heart over where they met/married (this is both for them!). 


Then with the image facing up fold in the sides so that the width is the same as your cushion (or just under), then pin so the sides overlap and sew down the raw edges. Snip the corners and turn and stuff.


Done! Cute, personal and cheap or free! And you get a little sneak peak at the whole hamper I managed to put together for the wedding.

Can't wait to show you the whole thing!


Wednesday, 18 July 2012

Wordy Wednesday (free printable!)

I may have mentioned that I offered to do a photo wall for my brother's wedding.

I used some quotes for it and made them into printables so they'd look pretty on the wall. I thought I'd start to share them on here in case you'd like any. Here's the first one: 


Click here to download. Love this quote.

Any suggestions for others let me know! Though I do have a few to share :) And if you'd like to know how to make your own click here.

Enjoy the rest of your week.

Monday, 16 July 2012

One day monday

Sorry for the lack of posts recently! My brother's wedding is this Saturday, and not only have I decided that I'll make all of their wedding presents, but I also volunteered to make a 13 metre wide photo wall for the reception, and am writing a guest post (plus I have work and a family...)! 

So I do have a LOT to show you, just now enough time to write the posts yet! But soon :) In the mean time, some procrastination!

2 min brownie ice cream 682x1024 Two Minute Mug Brownie

SO much awesome here! I actually already made this! And it is seriously delicious. So easy, and I bet you already have the ingredients in your kitchen. Found over on Babble.


You know my boy loves all things dinosaur! I want to try one of these tees for Ethan. The reverse applique on the left is from Pure Joy, and the one on the right from my friend Kathryn over at Aiming for Swan Like (who is also my go to friend for all kinds of sewing advice!).


These eclairs look so delicious, but for the first time I feel like I could actually make these! Found over at The Daily Smash. Such a great step by step!

Socktopuses: Take a sock, stuff with fabric or plastic bags.  Sew shut.  Cut bottom of sock into legs.

These "sock-topuses" are such a great idea! I have lots of odd socks I can't bear to throw away that would be perfect for this, and our no spend summer! Images here.


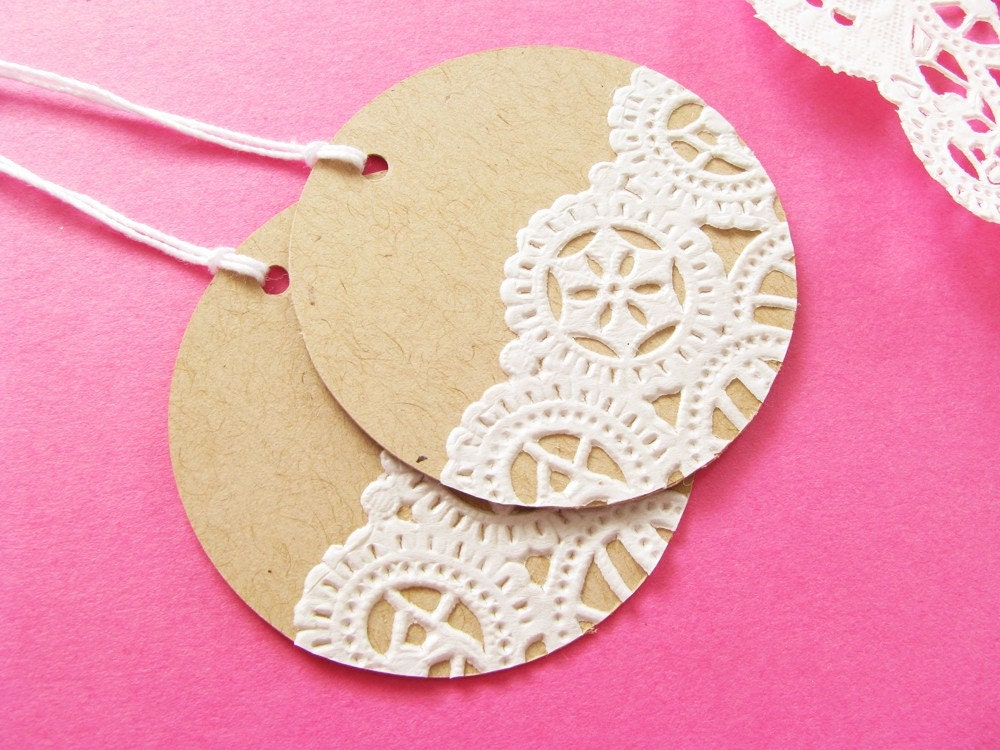
ON SALE - Vintage Doilies Gift Tags - Set of 10

Finally, I love these gift tags from Ilovedieline Studio on Etsy. So cute, and you could totally DIY these yourself if you had the time, some cute paper and doilies and you're away!

Have a great week! We're off to the beach today, hubs has taken a day off before the summer holidays start so we can enjoy the beach free from school children! :) I'll have an ice cream for you!

Thursday, 12 July 2012

Huge mess to guest ready (aka bathroom re-do)


I'm just gonna admit it, my bathroom has been embarrassing us for quite some time. 


Toys, flannels, towels, shampoos and more than necessary toilet rolls have littered the teeny tiny room since we moved in.


Every time we'd have someone over and they'd ask to use our bathroom I'd have a mini internal freak out, trying to remember if it was clean (normally no) and tidy.


So I gave it a big pretty up and sort out. First I decided I needed something to put all our everyday items in. 

For now I'm using this basket I got as a two pack from Ikea years ago. It washes really well, so our bottles and the kids' bath toys go in here to create the illusion of a more tidy space.


The kids are actually doing really well with it, but my poor hubs is still struggling with the new system...


It's the same story with the laundry basket and his socks, for some reason he is unable to get socks inside the basket. 


Good job he's so hot. ;)

I also wanted something pretty in here to make me like the room happier (and also to distract guests from the fact that I live with a four year old that doesn't always flush...)

I made it as a printable, so if you'd like the same quote as mine download it below!


(click here to download)

Had another in mind? Though I'd do a quite step by step of how to do your own on Picmonkey.


Open picmonkey.com and upload a photo you've not changed the dimensions of, so that you can print off your quote in regular photo sizes.


Then select "overlays" from the far left menu and choose geometric.


Choose the first shape (a rectangle) and drag it so that it covers the whole area, change it to your colour of choice. You could save it at this point so that you always have a blank photo to use for text. Then click the button to the right of undo/re-do (above your photo) or "merge overlays" to stop them moving while you're adding and moving around text.


Now you can play around with the overlays and make a nice background or leave it blank.


Now select "add font" from the left menu and write out your quote or text however you want!


Then save and print out however you would normally! 

Here's how ours looks in the bathroom now.


Such an improvement!


And the quote reminds me that although my kids may block the toilet with paper, or flood the floor, or forget to flush, they are still awesome :)

What quote would you do?

Join the 14 million people who have already joined the Clean Hands campaign by using Kleenex Hand Towels, and click here for savings and more! 

I was selected for participation in this campaign as a member of Clever Girls Collective.