Sunday, 28 October 2012

Personalised lunch boxes (without any fancy equipment!)


Both my kids needed new lunch boxes this school year. 


I love these kind because you can separate easily  and don't  need lots of tubs and containers. (no, sistema are most definitely not paying me, I just love these lunch boxes!) But let's face it, not so unique or child friendly design. 

So here's how to make yours eye catching and hard to get lost, and for bonus points, it'll help your pre-schooler learn their name!


Grab a piece of colourful vinyl and measure the area by sight - you know I rarely get rulers out.


Cut the vinyl to a rectangle the same width as the indent square, and as tall as you want your letters.


Turn the vinyl over and write out the name you want.... Then realise you were supposed to be doing the letters as a mirror image.


Cut out the ones that aren't effected by your mistake and scribble to make the remaining letters a mirror image.


Check that thankfully you cant tell all the crazy that's going on on the back side, and place as desired.


Peel off the back and stick down!

Done. Of course, you could miss out a couple of those middle steps and just do your letters the right way first time, but where's the fun in that?!


Love how much you can fit in these!

Plus these are dishwasher safe too! I've had vinyl on cups for over a year now and it's held up really well. And lets face it, if even the lunch box lasts a year I'll be pleased with that! :) 

Wednesday, 24 October 2012

really easy but impressive risotto


I always get compliments when I make risotto, I think most people think it's really hard to get right - which is also what I thought until I made it! It's actually really yummy and filling, but doesn't take much effort. Here's how easy it is in case you're fancying something different tonight:


Chop your veg smallish and add now if they need to soften. I used a large onion, two carrots and half a broccoli. If you're using peas or sweetcorn just add them near the end.


A couple of minutes later add your meat, I used two chicken breasts and three rashers of bacon, but you could even leave out the meat and just stick with veg.


Don't leave the meat more than a couple of minutes before you add your risotto rice. I use around 300g for our family of four and have plenty left for lunch the next day.


After the rice has been in the wok a few minutes add a bit of stock. I used about 800ml of chicken stock in total. Add it gradually and stir well after each addition. While the rice absorbs your stock feel free to clean your kitchen, or as I chose to; sew up some new place mats. My sewing machine is in my kitchen/diner so I'd sew a bit then add stock and stir.


Once your rice has absorbed your stock add some cheese. I use mature cheddar. Give it a stir...


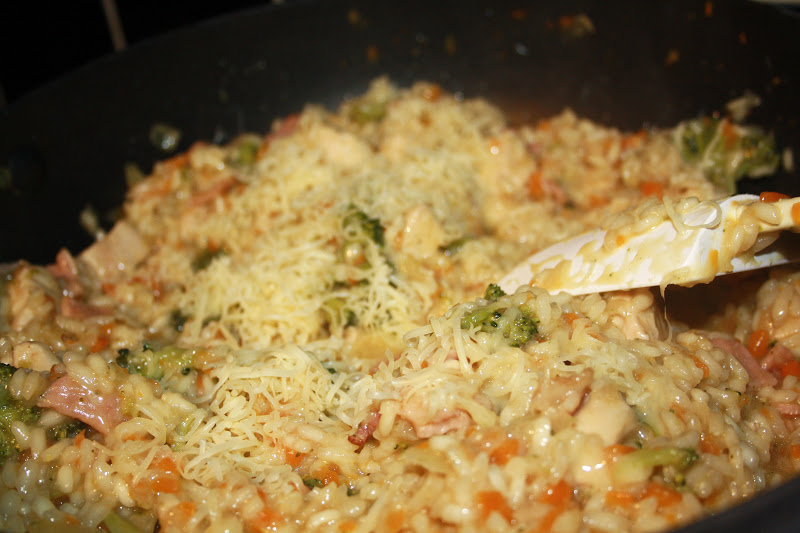
and it should look something like this. Gooey, but not pooling stock anywhere.  I always check if mine's done by eating a little and making sure the rice is soft. 


And you're done. Perfect for entertaining or just a tasty hearty meal. It takes me around 40-50 mins from chopping to eating, but you're not tied to the kitchen for most of that time.


Bit gutted I told the kids I make spaghetti bolognese tonight.

Fabric place mats tute coming soon!

Tuesday, 23 October 2012

"meh" to "oh yeah" men's tee


This top has a funny story behind it. My husband and I had just watched The Avengers and I had popped on Pinterest and seen this tutorial from Cheri at I am momma hear me roar for an avengers tee. I showed my husband and laughed, thinking about it being a coincidence, but then he got excited and asked if I could make him one!


So I got out my trusty freezer paper and started tracing the free pdf Cheri had put up, just leaving a gap where hawk eye was (the hubs thinks he's a bit lame, "so he just shoots?!") and replaced it with a googled image of the hulk. For a freezer paper tute click here.


He loved it so much he even said as much on facebook, that it was his favourite craft project I'd done! Not bad :) Though he still was reluctant to show his face for the whole of the internet to see, he was actually recovering from an abscess on his wisdom tooth...


I did manage to get one though! Think this is my first successful thing I've made for my husband that wasn't food based! Any of you been able to make something your significant other has worn?

Thursday, 18 October 2012

"meh" to "oh yeah" boy tee


Ethan loves this top! It was a £2 sale tee that was fine, but definitely not a favourite. 

Now it his first choice of top to wear.


He even got to choose the dino silhouette he wanted from the great store that is google images! Then I just traced to make a freezer paper stencil, cut and painted.

For a more in depth freezer paper stencil tutorial click here.