Wednesday 26 October 2011

Change Up

I wanted to make things a little cleaner on the blog, so I've spent my evening fiddling and Googling, and I now have something I like. 

I changed the header myself using Picnik and this tutorial from Life Sweet Life. It was so simple and accessible, even for a complete computer novice like me!

I'd love your opinion. 

No Bake Chocolate Swirl Cheesecake


Sounds simple? It totally is! But tastes heavenly.


(Loosley based around this recipe here)


Ingredients:


200g digestive biscuits (Or whatever kind you like, just add a little more/less butter/melted choc)
60g butter
75g dark chocolate
300ml double cream
85g caster sugar
150g white chocolate
250g cream cheese
150g greek yoghurt
50g milk or dark chocolate (for swirling)


1. Bash up all the biscuits until they resemble crumbs.


2. Melt the butter and dark chocolate together, then mix into the biscuit crumbs well. 


3. Press mixture into a buttered cake tin (preferably spring form, but I've used a silicone one before and one with a push out bottom and it work fine, you just need a little extra jiggling). Chill in the fridge.


(You actually just need to butter the bottom part, Izzy got a little carried away!)


4. Whisk the cream until it can create peaks when you lift the whisk out. Then stir in the sugar.


5. Melt the white chocolate over some hot water, while it's melting cream the cream cheese and greek yogurt together until smooth.


6. Mix the melted chocolate and cheese mixture together quickly and then stir in the cream.


7. Melt the milk chocolate while you spoon the cheesecake mixture over the base.


8. Swirl in the melted milk chocolate with a knife (I used a spoon, but a knife would have worked better) till you get pretty swirls. Make sure the top is even with the back of a spoon.


9. Chill for four hours (though I'm not sure I've ever waited that long/been that organised), pop out of the cake tin, divide and eat!


Incidentally, this is the same mixture I used in the individual cheesecakes with edible cases, my first ever blog post!


Hope you enjoy.


I'd love to see any of your own versions!

Thursday 20 October 2011

Bowl from an old Vinyl Disc

My little brother turned 23 recently. (Well I suppose he is taller than me, but 18 months more wisdom has to mean something right?)


So he's living on his own, a student and a BOY. I find it hard to make gifts for any males. But I eventually came up with this:


My dad told me he used to make these loads when he was younger. And they're so simple! Just place on top of a large glass in the oven for a few mins till it gets soft and melts down!


Apparently you can mold it however you want at this stage but I was nervous as it was my first time. 


Well actually second. The first time I thought I was following my dad's instructions and was under the impression that the disc would curl up and create a bowl by itself. 


I ended up with a vinyl disc with impressions in it from my oven shelf as it melted through it. It actually had surprisingly sharp edges. 


And I was later told by my husband that he thought that one was worth some money...in my defense it was in the garage.


Anyway, it is easy, just use some common sense. As I did the second time.


And here it is all packaged up. A little reminder that on this day 23 years ago my parents decided to use Zeezrom as a middle name.


Tough break Ben.


Happy Birthday!

Wednesday 19 October 2011

Super Scrimpy Storage

So I had a few minutes to kill before the gym today thanks to my husband car sharing with someone from work. (Two days a week that car is mine, and I totally feel smug driving where ever I want! A weird side effect of not having a car for nearly a year.)


So I dropped into Wilkinsons to check out the offers. They have some pretty sweet discounted items sometimes. 


Like these...   


Price each?


Even better!


I thought the smaller one would be perfect as an art caddy. Then the kids will stop using my desk all the time. Then they can take their creativity wherever they want. :)


So I got three cups from a recent trip to Ikea (I think they were 90p for six) and filled them with some art supplies.


(Don't worry for my carpet, the felt tips are actually special ones that only colour on a certain book. No clothes or cream rugs need to worry.)


Then I arranged them all pretty.


Well actually it was the only way that fit.


And then I thought I'd use the other in my bathroom. 


My bathroom is seriously tiny, but this will fit perfectly between the toilet and wall.


Ready for some super prettied up toilet roll?


Sure, I could go more posh...


Awesome toilet roll holder :)


I mean, I'm pretty sure the queen has one of these, but due to the size of our bathroom our knight would end up with his hands on your lap...Awkward.


And why no photos of in actually in my bathroom?


Honestly? 

I didn't want to clean it today. (Terrible housewife!) 

At least the holders clean!

So what have you used recently for storage? I'd love some more ideas! I still think it's pretty crazy that I used cups for crayons! 

And what bargains have you scored recently? I need some inspiration, I only ever shop at Ikea or Wilkos for home things.

Tuesday 18 October 2011

Map Coasters

I found this a while back:


Pinned Image


And you know how I love to use my map book. (It is looking in a pretty bad state now! And I promise there aren't many pages left!)

I've also seen a few projects about where people have turned tiles into coasters. (Here's a link I saved.) So I thought I try to have a go myself.

After cleaning and drying the tiles I cut map pages to the same size as the tile and Mod Podged it on. 

(You'll probably notice mine are a little larger than the tile. I wasn't very accurate and ended up trimming all mine later. I would recommend making a template that is exactly the right size first time!)


I made three sets, don't be intimidated! I also made sure that as well as some random map places I also had some meaningful ones, like where they were born, live now, met their wife, went to university etc. .


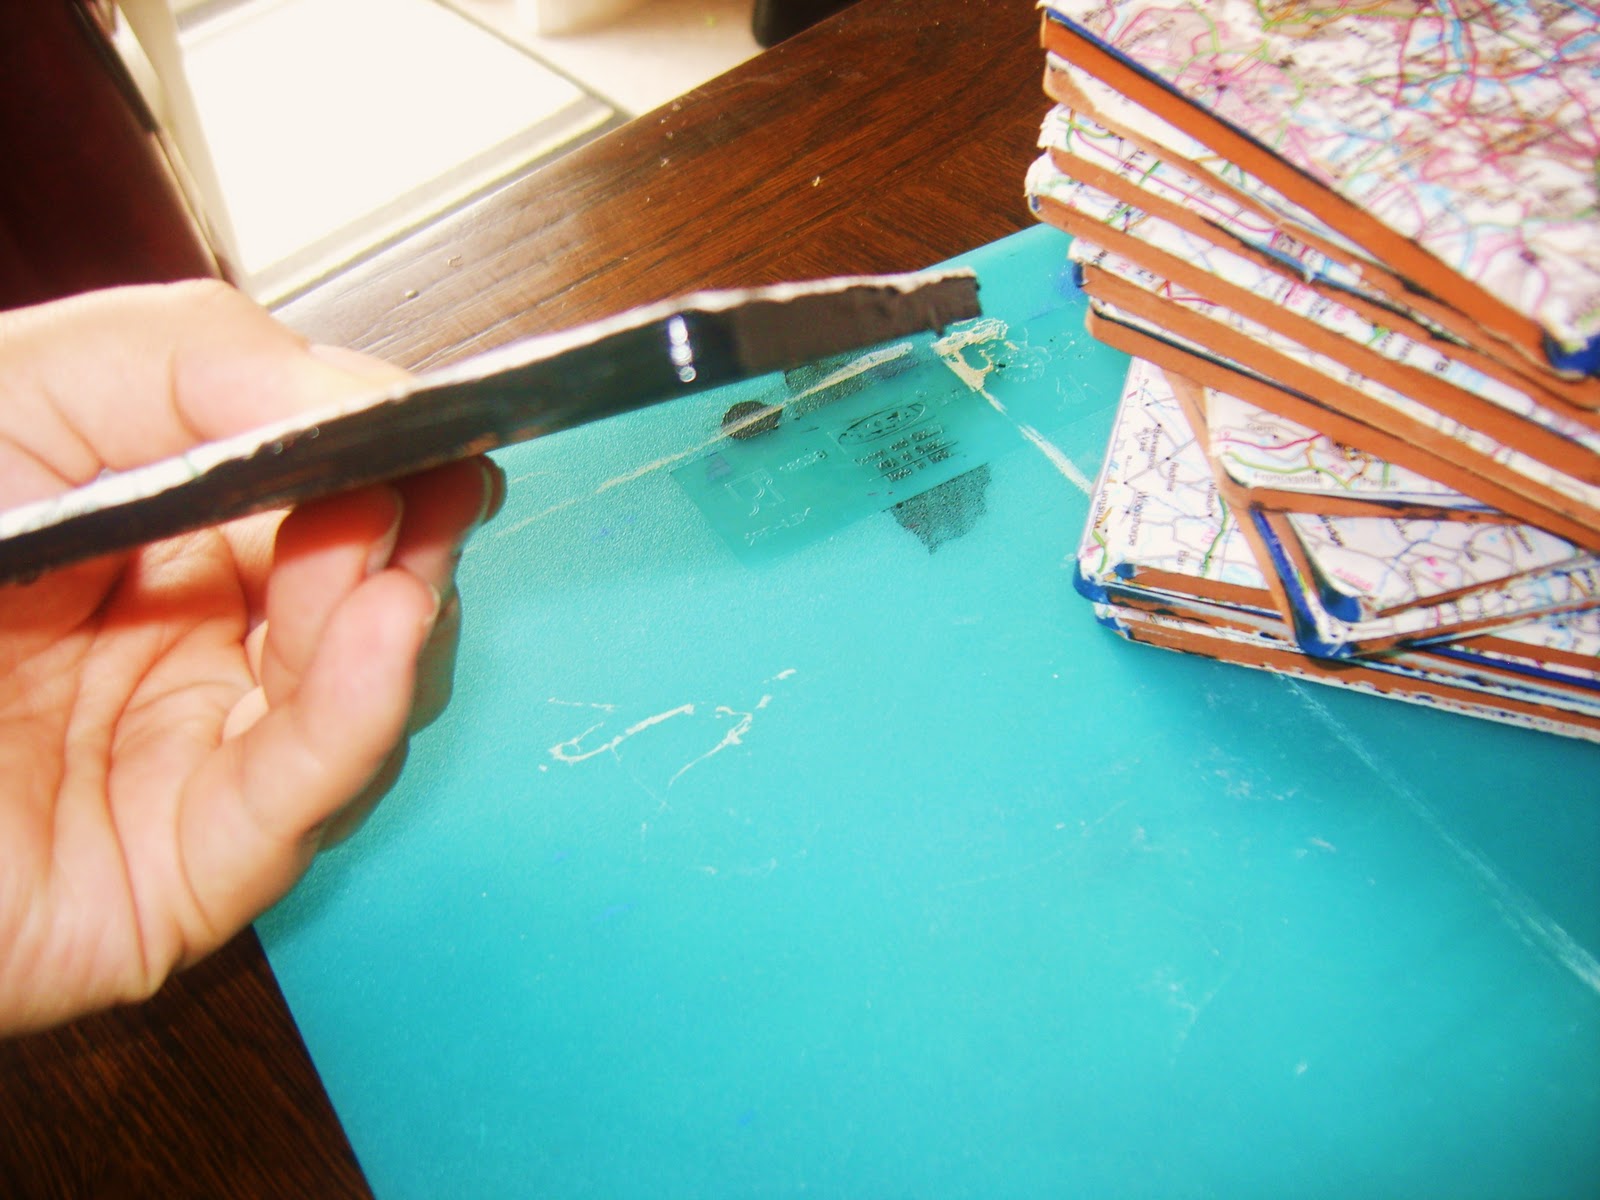
I then painted the sides and underneath with black acrylic paint. You don't need much, two squeezes from a tube was plenty for thirteen of mine. (These tiles are pre-trimming stage for me!)


I then sealed it with two more coats of Mod Podge and hot glued on some squares of felt that were a little smaller than my tiles (maybe a cm smaller? Can you tell I mostly just guess?)


All done!


And my favourite bit?


That I now have three man presents sorted! (And don't tell them, but they were completely free! I already had everything I needed! The tiles were from five years ago when we re-tiled our shower.) 

Properly manly, useful and personal. 


Even with shiny ribbon tied around!


At least it's blue ribbon.


Photobucket

Sunday 16 October 2011

One Day Monday - Christmas Special!

So Halloween isn't massive over here in the UK like it is in America and other places, but I love all the cute projects, decor, outfits and treats I've seen in blogland recently. 


However for me not many will get made (except the treats!), Izzy may go trick or treating in her princess dress next door, or we may drive over to out parents and surprise trick or treat them, but it really isn't such a big deal here. (We actually had no trick or treaters to our house last year and we live very close to three primary schools.)


So instead I've been getting excited about Christmas! I've been doing okay with the homemade gifts, 


(I actually am this 'organised', though it's only because of my terrible memory as I forget what I've made and what ideas I've had for who.)


...so I'm now allowing myself to look more at decor and recipes. 


So if you're blocking your ears at this point and chanting 'not for ten more weeks, not for ten more weeks', I won't be offended if you skip this weeks One Day Monday!


Pinned Image

How cute is this advent calendar? I love that it would be great for adults and children, plus pretty simple and inexpensive. Found here on Pinterest.

Pinned Image

I love this recipe for air dry porcelain clay from The Junk Wave. You could make all sorts of gifts and ornaments with this. Plus it looks pretty cheap for the ingredients. You could do this ornament in mini with finger prints:

Pinned Image

Found here.

And on the theme of ornaments...

Pinned Image

From here.

Pinned Image

I love this garland from him.her.and olivia.

Pinned Image

And I'm not sure I should be showing you this one as I've already started this and it looks no where near as good... This very pretty version is found at Allsorts.

Properly lined make up bags


You may have read this post or this post about my attempts to figure out how to do a lined make up bag or man bag.


On this one you may notice I have up and just hot glued some ribbon over the seam... And the other's not much better, I actually had the seams visible but as it was vinyl and not going to fray I let it be.

But I decided that enough was enough and so I got a proper tutorial and (mostly) followed it.


Ta-da! So nice. Plus the outer fabric is an old dress from Izzy that was stained on the front.


And the fabric flower is made from another Izzy dress with a similar story.(My girl LOVES to paint!) Um, and the button may have fallen off a shoe I had. 

It's okay you can call me cheap. (Though I prefer resourceful or economical, though it's really cheapness.)

And when I said I mostly followed the tutorial...


I may not have been referring to it as much as I should have. In that I read it a few weeks ago and then went straight into sewing without looking back.

Second time lucky?


I even got fancy and boxed the corners!


Phew! This one's for my husband's grandma. I think the fabric is perfect for her. (Though it was my fifteen year old sister that chose it originally for a duvet.)

Kate, from See Kate Sew has a seriously amazing blog. Her tutorials are so easy to follow, and she makes things so easy to understand. Even for a total beginner like me!

And please don't do a side by side comparison between the two. It's not flattering, but I'm just proud I've been able to 'do the zipper'.